Publisher and Subscriber
The Publisher and Subscriber communication model is a common variant in message queue implementations. The ROS documentation provides a more detailed description, so please refer to the wiki or documentation page to get a deeper insight. In short, the ROS Publisher publishes data on a topic that a ROS Subscriber can subscribe to. Since every topic has a specific type, the publisher can only publish data of that exact type and it will fail to do so otherwise. The subscriber must behave likewise and only subscribe to a topic that fits it’s datatype. Thus, to connect Publisher and Subscriber they need to have the same type, namespace, and topic while they are connected to the same roscore.
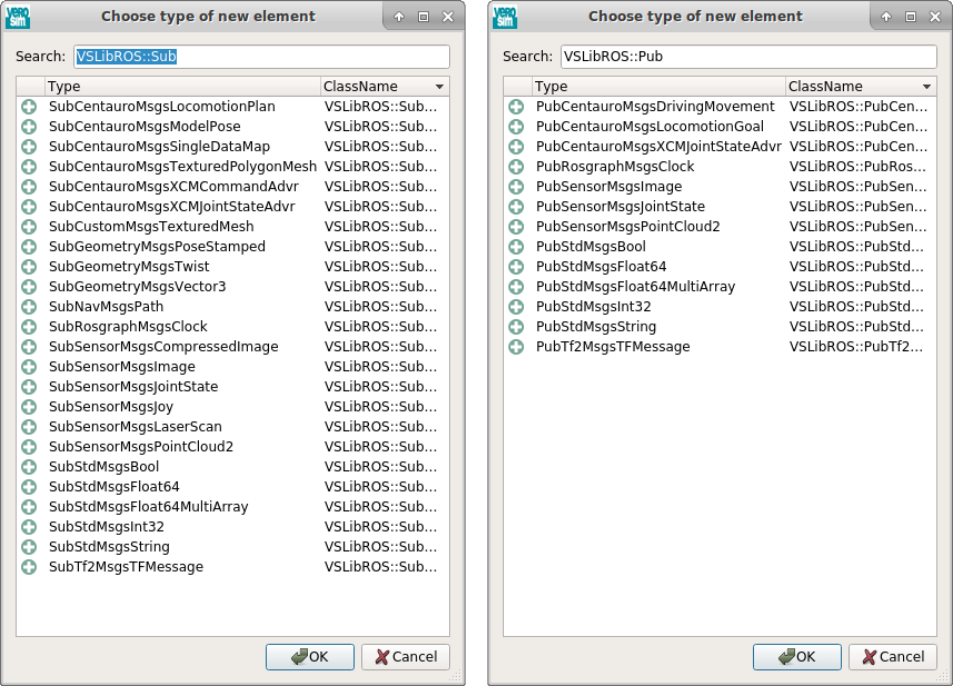
The General usage of ROS section introduced the naming scheme inside VEROSIM. It will help you to identify all the Subscribers and Publishers that are available in VEROSIM. For completeness, the following image shows all the Publisher/Subscriber extensions that you can add to your model.
We will now introduce a practical example that you can refer to if you need information on how to access ROS Topics as a Publisher or Subscriber. We will pick up on the prior example of the robot that should be mirroring the motion and state of a physical robot.
Subscribing to the JointState topic
As you can see, you should add a VSLibROS::SubSensorMsgsJointState extension to your model. That will allow you to subscribe to a topic and receive data from the environment.
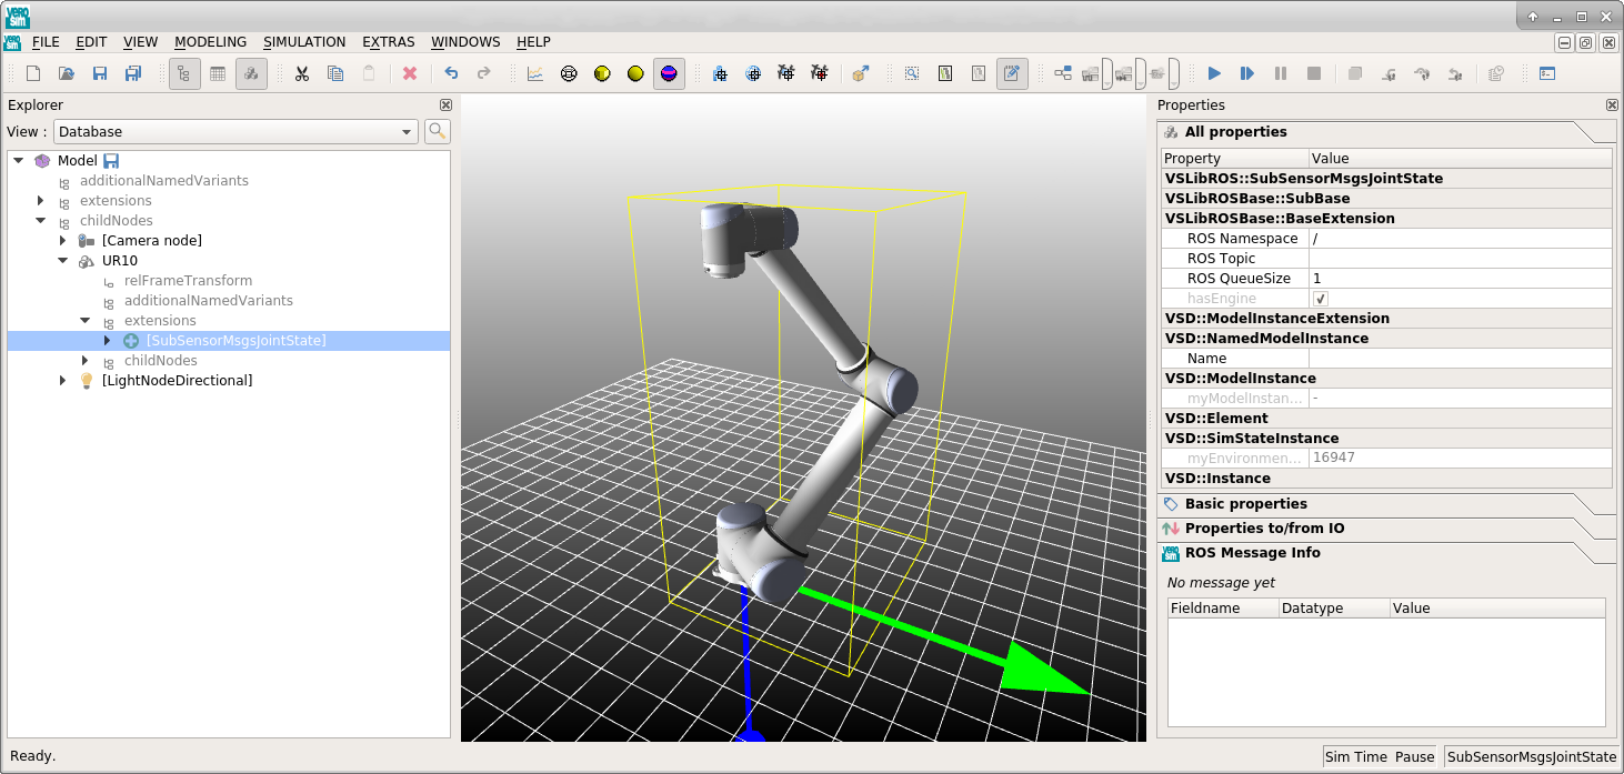
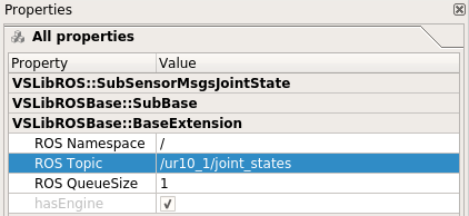
The second step to go is assigning the topic name you want to subscribe to. Select the previously added VSLibROS::SubSensorMsgsJointState and switch to the Properties Widget. You will find the ROS Topic property that you assign the value /ur10_1/joint_states. That in general is the topic name for the joint position of the first robot.
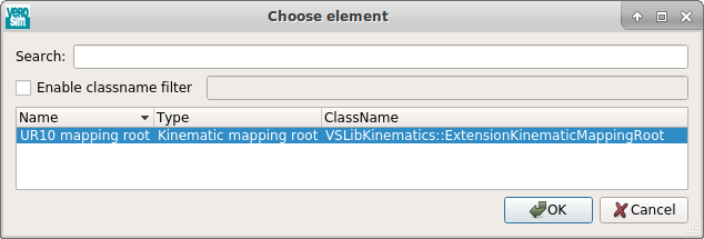
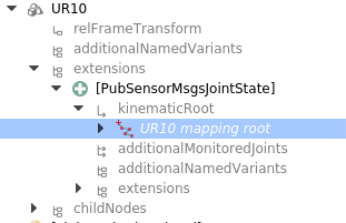
The next step, is to assign a kinematic the received joint values should be applied to. Expand the VSLibROS::SubSensorMsgsJointState extension and open the context menu on the kinematicRoot property by right clicking on it.
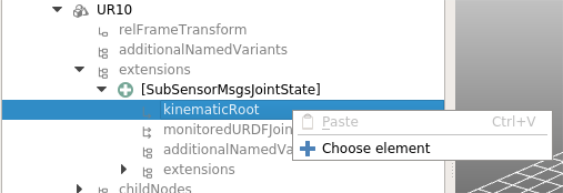
A dialog will open that you can use to select a kinematic root. This model only contains one robot, so select the UR10 mapping root and click OK.
Afterwards the kinematic root will be referenced by the property and configuration of the Subscriber extension is finished. The next step is to enable the extension and run the simulation to start receiving data.
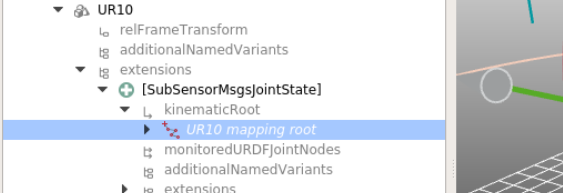
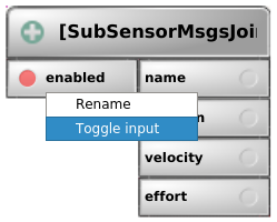
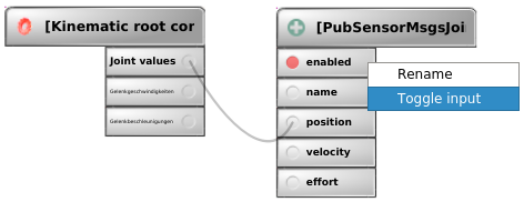
To enable the Subscriber you need to switch to the IO Editor. Navigate to the menu band and click Modeling -> IO editor. You will find the Subscriber’s IO Board there that contains a single input enabled and a number of outputs that represent the current joint state. You could use the outputs for different applications, but in this case it is sufficient that you referenced the kinematic root.
The enabled input will switch the Subscriber on or off. To enable it, right click on the input and click Toggle input.
If a Subscriber is enabled, it will start receiving data with the simulation start. Click on the respective action in the toolbar and you will see the simulated robot mirror the physical robots’ state.

Publishing to a JointState topic
Using Publishers is very similar to using the Subscribers. We will use the same robot model that we used earlier to reverse the roles. This time the simulated robot will publish its joint state so that another ROS node can subscribe to a topic and receive the state of the simulation.
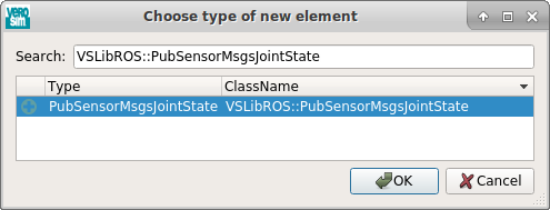
Firstly, you need to add the VSLibROS::PubSensorMsgsJointState extension to the model.
In a second step, you modify the property ROS Topic and set an appropriate name that you will also need to use for a potential Subscriber.

Then you have two choices. You can set the kinematicRoot reference like you already did in the previous section.
Alternatively, you can connect the Joint values output of the kinematic root with the position input of the Publisher in the IO Editor.
In any case you need to enable the Publisher by toggling the input and run the simulation afterwards.